Add Screenshot for Selenium JUnit to test reports in BuildWise CT Server
Test Failure Debugging Tip — Displaying Failed Test Screenshots in BuildWise’s CT server

This article is an excerpt from my new book, Effective Web Test Automation with Selenium WebDriver and JUnit, available on Leanpub for only $20. AgileWay Newsletter Paid Members can get this eBook for free.

In a previous article, I walked through how to capture screenshots on test failure for Selenium JUnit (Java) tests. This means that when tests fail, you can quickly see the current state of the web application, making debugging easier.
When you have a sizeable E2E test suite, it’s essential to run the entire suite regularly in a continuous manner; otherwise, tests will become increasingly difficult to keep valid. Ideally, we want to be able to view test failure screenshots directly on a Continuous Testing server.
In this article, we’ll look at how to link those screenshots to BuildWise CT server (a free, open-source and international award-winning Continuous Testing Server)
BuildWise Screenshot Convention
BuildWise can show screenshots on test failure, as part of the failed test results popup. This is useful for validating and debugging test failures at a glance.
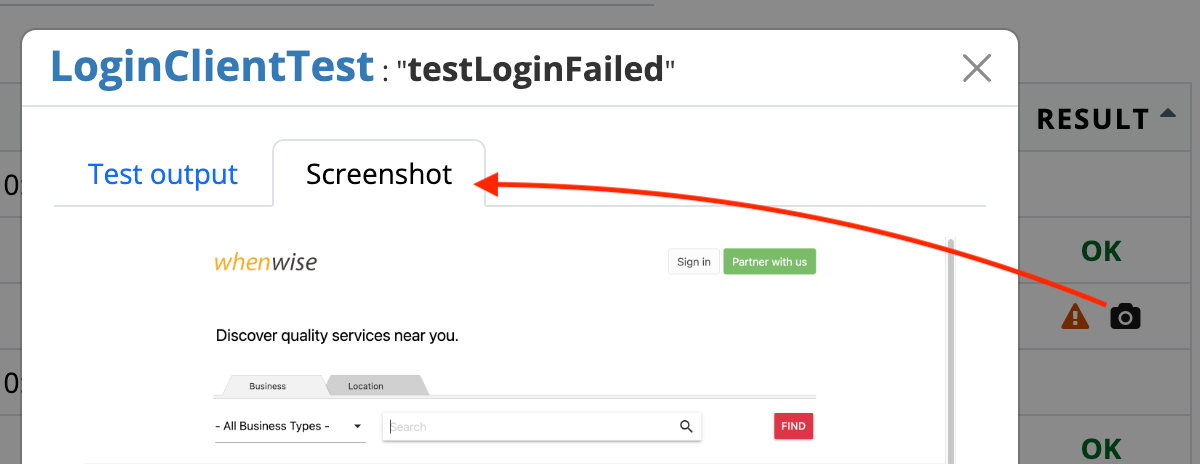
For BuildWise to find screenshots and link them to a test, the file must be saved in the designated folder (screenshots under the project’s “Test results folder” within the BuildWise working directory), using the correct naming convention: “ClassName/MethodName.png”.
For instance, for the LoginClientTest file’s testLoginFailed, the screenshot would have the name LoginClientTest/testLoginFailed.png.
Saving the Screenshot
This is covered in the previous article, just change the name of the file and directory to save the file to in AbstractTest.
@Rule
public TestWatcher screenshotOnFailure = new TestWatcher() {
    @Override
    protected void failed(Throwable e, Description description) {
        takeScreenshot(description.getClassName(), description.getMethodName());
    }
};


private void takeScreenshot(String className, String methodName) {
    if (driver != null) {
        try {
            if (((RemoteWebDriver) driver).getSessionId() != null) {
                File screenshot = ((TakesScreenshot) driver).getScreenshotAs(OutputType.FILE);

                File testScreenshotDirectory;
                String buildwiseHome = System.getenv(”BUILDWISE_HOME”);
                if (buildwiseHome != null && !buildwiseHome.isBlank()) {
                    String buildwiseProjectId = System.getenv(”BUILDWISE_PROJECT_IDENTIFIER”);
                    Path screenshotDir = Paths.get(buildwiseHome, “work”, buildwiseProjectId, “sources”, “source”, “project”, “reports”, “screenshots”);
                    File directory = new File(screenshotDir.toString());
                    if (!directory.exists()) {
                        directory.mkdir();
                    }
                    testScreenshotDirectory = new File(directory.getPath() + File.separator + className);
                    if (!testScreenshotDirectory.exists()) {
                        testScreenshotDirectory.mkdir();
                    }
                } else {
                    System.out.println(”buildwiseHome: “ + buildwiseHome + “ not found”);
                    testScreenshotDirectory = new File(System.getProperty(”java.io.tmpdir”));
                }
                System.out.println(”Save screenshot under “ + testScreenshotDirectory.getPath());

                try {
                    Files.copy(screenshot.toPath(),
                            new File(testScreenshotDirectory.getPath() + “/” + methodName + “.png”).toPath(),
                            StandardCopyOption.REPLACE_EXISTING);
                    System.out.println(”Screenshot saved: “ + methodName + “.png”);
                } catch (IOException ex) {
                    ex.printStackTrace();
                }
            }
        } catch (Exception e) {
            System.out.println(”Screenshot not saved due to an exception:  “ + e);
        }
    }
}
It might look more complex than the previous article, but all it’s doing differently is locating the screenshot directory and using the test’s class and method to generate the file.