Set up Appium 2 to Run XCUITest (for iOS)
Setup and run an Appium 2 automated iOS test with XCUITestDriver
Appium is a free, open-source and dominating test automation framework for desktop and mobile applications. Appium, like Selenium, is WebDriver-based.

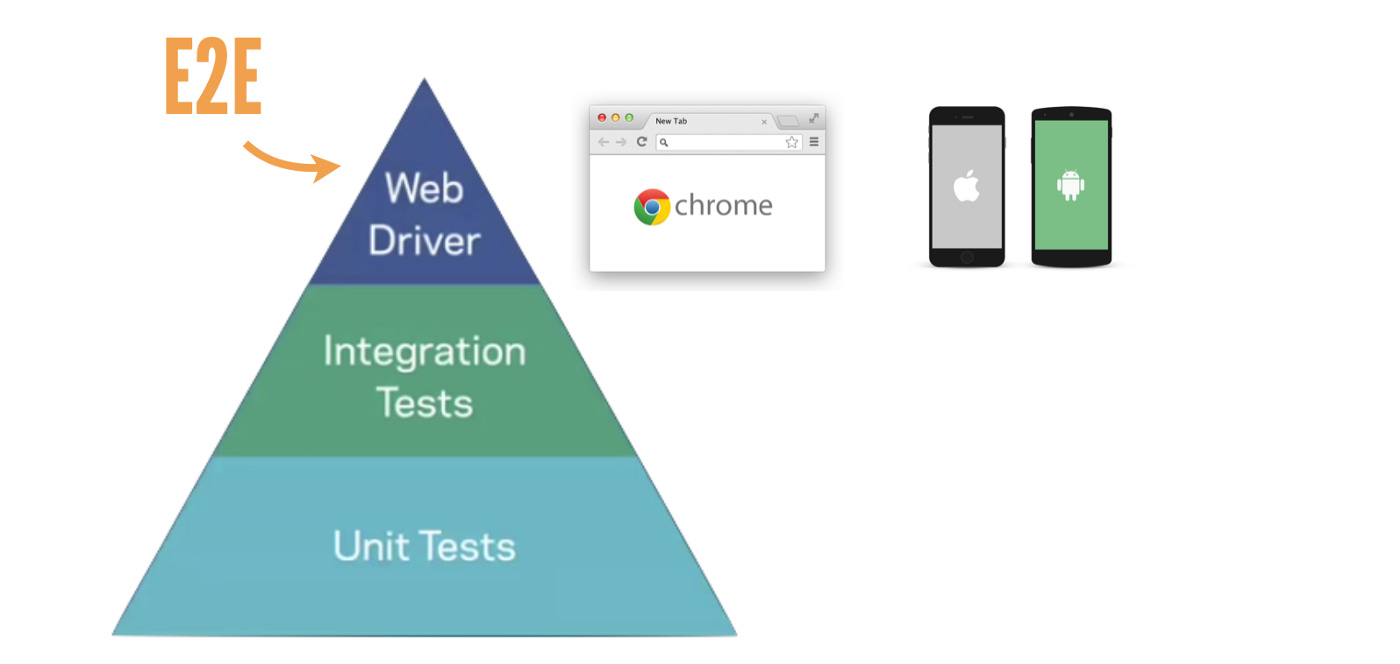
“For all of our end-to-end tests at Facebook we use WebDriver, WebDriver is an open-source JSON wired protocol, I encourage you all check it out if you haven’t already. ” — Katie Coons, a software engineer at Product Stability, in “Continuous Integration at Facebook”
As this Facebook engineer said in the presentation, by using WebDriver-based automation framework, the automation test scripts for iOS, Android and Web, the APIs are very similar. This means big time-saving! It comes as no surprise, Microsoft dumped its own Coded UI Test tool and recommended Appium and Selenium too.
Appium version 2 is coming out soon and is already in Beta, the latest version 2.0.0.beta 46.
This tutorial will show you how to set up Appium v2 on a macOS computer to run XCUITests on a sample iOS app.
Zhimin’s notes: Many software professionals have heard of Appium, a small percentage tried Appium but most failed. The reasons are the similar to Web Test Automation failures. Doing a hello-world demo (like this article) is not hard, but to develop and maintain a reasonable-sized test suite as regression testing (run multiple times a day) is far more challenging. There are many other factors to consider, such as:
- Maintainable Automated Test Design
- High productivity via a good tool, such as TestWise
- Running them in a good Continuous Testing server, such as Facebooks’s sandcastle or BuildWise. Please note, Jenkins or Bamboo are CI servers, not suitable.
A good thing with the setup and approach Courtney did, the practices that made her web test automation successful (extrememly rare, > 99+%) can be directly used for mobile test automation.
Set up Appium Server
1. Install Node.js (the latest version is 19, recommended to use 18)
If you already have Node, you can use Homebrew to update it to the latest version with:
brew update # optional, updates brew and tells you if node has a newer version
brew upgrade node@18
If you do not have Node, install it by running:
brew install node@18Verify Node has been installed/upgraded successfully with:
node -v2. Install appium using npm
npm install -g appium@nextPlease note -g flag is important. Below is a sample output.
3. Install XCUITest Driver
Appium, like Selenium, drives an app via external driver software.
Zhimin’s notes: Appium v2 introduced driver management, much easier.
To show available drivers:
appium driver listThe output will look like this:
courtney@MacBook16 ~ % appium driver list
✔ Listing available drivers
- uiautomator2 [not installed]
- xcuitest [not installed]
- youiengine [not installed]
- windows [not installed]
- mac [not installed]
- mac2 [not installed]
- espresso [not installed]
- tizen [not installed]
- flutter [not installed]
- safari [not installed]
- gecko [not installed]
Install the XCUITest driver, xcuitest.
appium driver install xcuitestThe output:
courtney@MacBook16 ~ % appium driver install xcuitest
✔ Installing 'xcuitest' using NPM install spec 'appium-xcuitest-driver'
ℹ Driver xcuitest@4.13.3 successfully installed
- automationName: XCUITest
- platformNames: ["iOS","tvOS"]
4. Start the Appium server
Just run a simple command to start an Appium server.
appiumSet up Appium Server
XC (in xcuitest) means Xcode. Get Xcode installed, for many developers, it should already be installed. If you do not have XCode, it is free on the App Store.
Once Xcode is installed, add XcodeHelper to Security and Privacy permissions.
Open System Preferences -> Security & Privacy -> Privacy -> Accessiblity and add XcodeHelper.
You can find Xcode Helper in the below path, open it in Finder and drag it to System Preferences to add it:
/Applications/Xcode.app/Contents/Developer/Platforms/MacOSX.platform/Developer/Library/Xcode/Agents/Download the demo iOS App
Appium provides a sample app on their Github page, link below:
https://github.com/appium/appium/tree/1.x/sample-code/apps
Download and save the TestApp.app.zip file. Do not unzip this file, leave it as a zip.
Appium Client
Appium works as client-server archtiecture. The client here means: automated tests + appium client library, in the same language. The choices are Ruby, Java, C#, Javascript and Python. I will use Ruby, the best scripting language for test automation.
The command below installs the Appium client library in Ruby language, appium_lib .
gem install --no-document appium_libAutomation Script
Below is a simple Appium automation script (I created using TestWise) to open the app in an iOS simulator.
require "appium_lib"

opts = {
  caps: {
    automationName: 'xcuitest',
    platformName: 'ios',
    platformVersion: '16.1',  # match on in Xcode Simulator
    deviceName: 'iPhone 12',
    app: "/Users/me/ruby-ios/sample-apps/TestApp.app.zip"
  },
  appium_lib: {
    server_url: "http://127.0.0.1:4723"
  },
}

@driver = Appium::Driver.new(opts).start_driver
application_element = @driver.find_element :class_name, 'XCUIElementTypeApplication'
application_name = application_element.attribute :name
puts application_name
Zhimin’s notes: the starting options has changed since Appium v1.
Save this script as xcuitest-sample.rb and run it with ruby xcuitest-sample.rb. If the installation and set-up went correctly, you should see the iOS simulator start up and the application name get printed in the console.
Make it Automated Test (in RSpec)
Now that everything is set up, we can create the automated test.
First, install the RSpec gem:
gem install rspecThe below test script opens the sample app and asserts the app’s name.
describe "Appium XCUITest TestApp" do

  before(:all) do
    opts = {
      caps: {
        automationName: 'xcuitest',
        platformName: 'ios',
        platformVersion: '16.1',
        deviceName: 'iPhone 12',
        app: "/Users/me/ruby-ios/sample-apps/TestApp.app.zip"
      },
      appium_lib: {
        server_url: "http://127.0.0.1:4723"
      },
    }
    @driver = Appium::Driver.new(opts).start_driver
  end

  after(:all) do
    @driver.quit
  end

  it "Get App Name" do
    application_element = @driver.find_element :class_name, 'XCUIElementTypeApplication'
    application_name = application_element.attribute :name
    expect(application_name).to eq("TestApp")
  end

end
Run this rspec test from the command line.
rspec xcuitest_appium_spec.rbOutput like below:
Test Execution
The below animated GIF shows the test being executed in TestWise.
Zhimin’s notes: I can develop Appium for iOS tests in TestWise, the same way as Selenium tests (for web).
Also, I can run these tests in our award-winning BuildWise CT server.
Further reading:


