Tutorial: Step by Step Implement Continuous Testing with Playwright: Part 5: Gain Productivity
Shortcuts and Tips and Tricks to Increase your Productivity when Writing & Debugging Playwright Scripts.

This article series targets absolute beginners who want to learn and use Playwright E2E (Web) Test Automation.
Part 1: Set up Playwright
Part 3: Run your first Playwright Test
Part 4: Tool & Project Structure
Part 5: Gain Productivity
Part 6: Design with Maintenance in mind
Part 7: More Tests *
Part 8: Set up Continuous Execution
Part 9: Run a small suite of Playwright tests in BuildWise, sequentially
Part 10: Parallel Playwright test execution in BuildWise
Part 11: FAQ
Many software engineers new to Test Automation don’t understand one aspect: Developing tests is only a minor effort in E2E test automation, so being highly productive is a must.
How do we become productive? By using tools well.
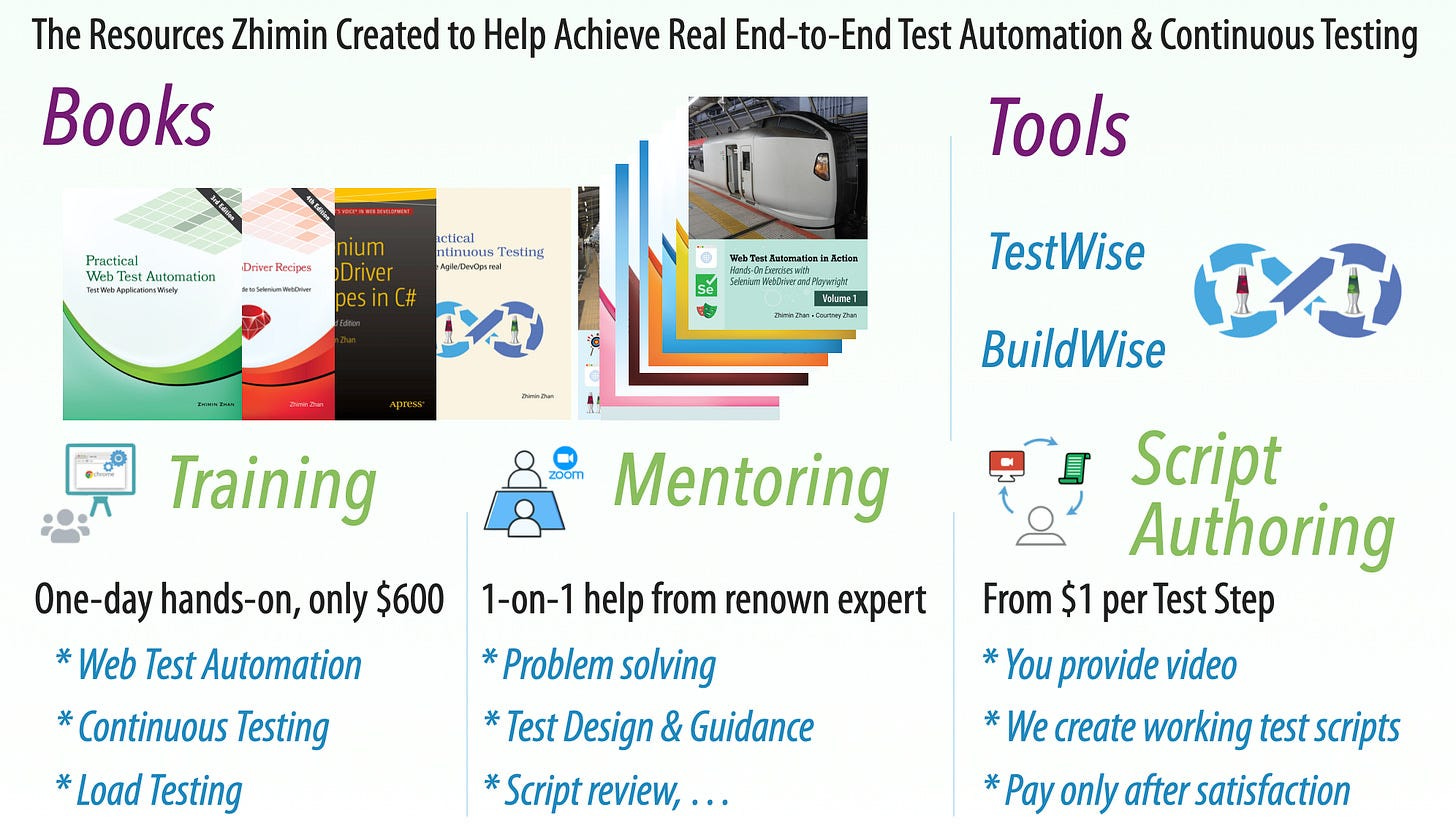
In Part 4, I briefly introduced TestWise, a testing IDE. In my book, I used Visual Studio Code. Playwright is more than a framework, compared to Selenium WebDriver, it offers in-built tools like Playwright Trace Viewer and Test Recorder (Playwright test generator).
Playwright Built-In Tools
1. Recorder (CodeGen)
npx playwright codegenIt will start a Chromium browser and Playwright Inspector window. Basically, a recording utility.
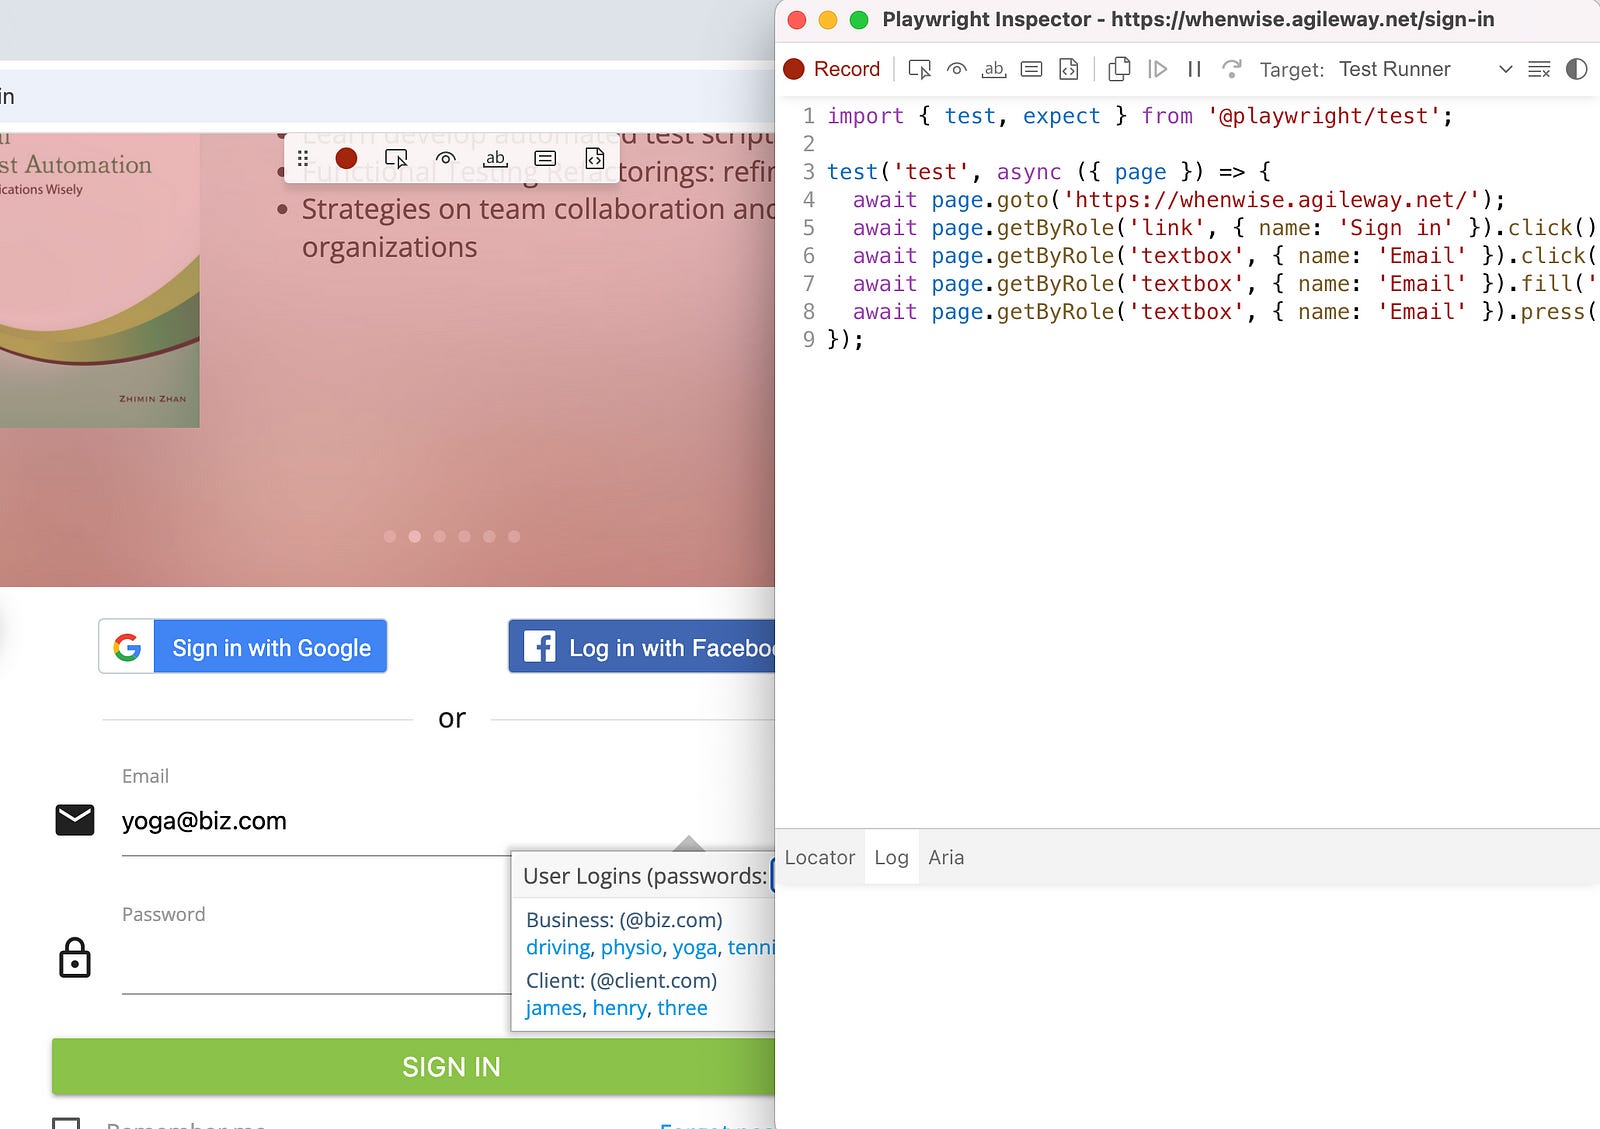
You may run a recorded test script. Beginners might think, “Wow, with this, I can just create my scripts. No need to learn”. Of course, it is wrong. Record-n-playback (the official term for this) has existed for three decades ago, and many commercial test automation tool vendors boast this feature. The result: nearly all commercial test automation tools vanished.
For more on record-n-playback, check out the article, “Record/Playback in Test Automation is Bad, mostly.”
My father and I don’t use recorders, but it is an easy way to get started with writing scripts/getting familiar with some language syntax.
2. View Trace
Playwright also allows you to run tests in “Trace” mode. Just add --trace on to the run command:
npx playwright test tests/login_client.spec.ts --trace onAfter the trace test is complete, you can access the trace page, which is a breakdown of the test. It includes a timeline, screenshots of every test step, Playwright’s logs and captures the browser console/network logs as well.
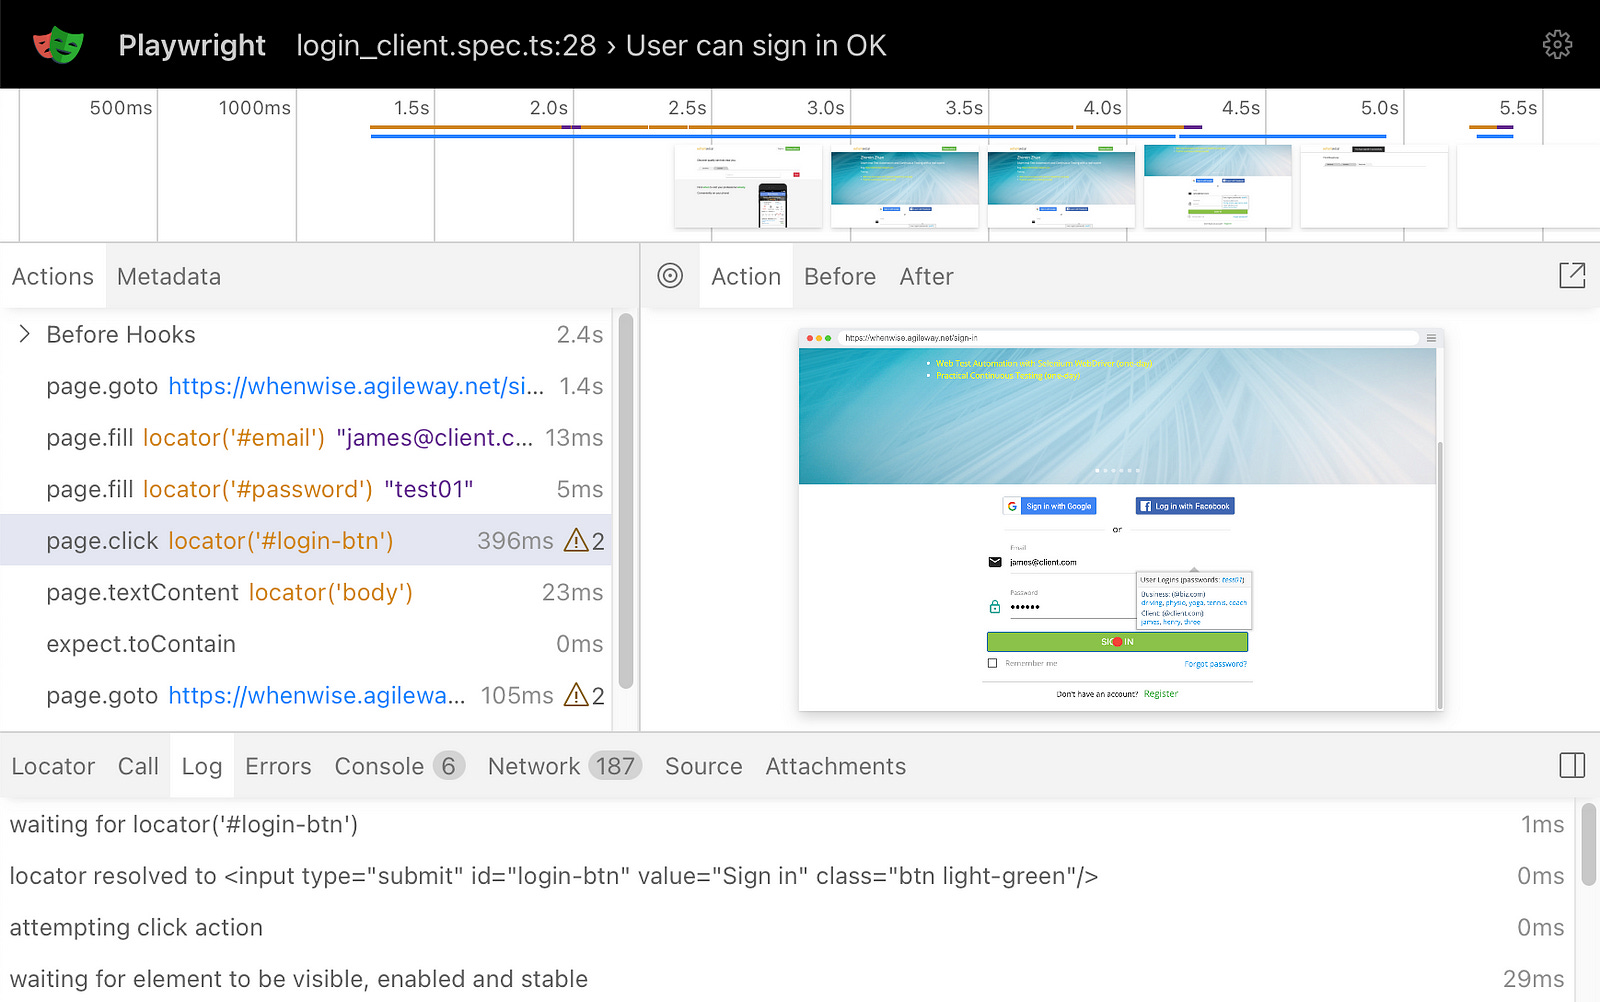
This can be helpful, but I rarely use it. Why? It breaks the rhythm, I much prefer doing scripting and viewing the actual browser window.
Some TestWise Features
1. Keep Browser Open for a While
When developing automated end-to-end (E2E) test scripts using RSpec or Pytest in TestWise, there’s a very handy feature: TestWise keeps the browser open in individual test execution mode. This is intuitive and practical for testers — after running a test script or a specific step, it’s natural to want to observe the browser and verify the outcome.
However, for JavaScript, the support for this feature is somewhat limited. My father, who developed TestWise, uses Ruby exclusively for his own E2E (API, Web, and Mobile) test automation, so the feature is most mature in that language. Due to some limitations in Playwright, TestWise cannot keep the browser open in the same persistent way. That said, there is a compromise — TestWise can be configured to keep the browser open for a short time after test case execution, allowing inspection. This duration is easily adjustable by the user.
By the way, if you happen to know a way to keep a Playwright browser session detached from the test script, my father would be thrilled to hear about it — and there might even be a reward in it for you!
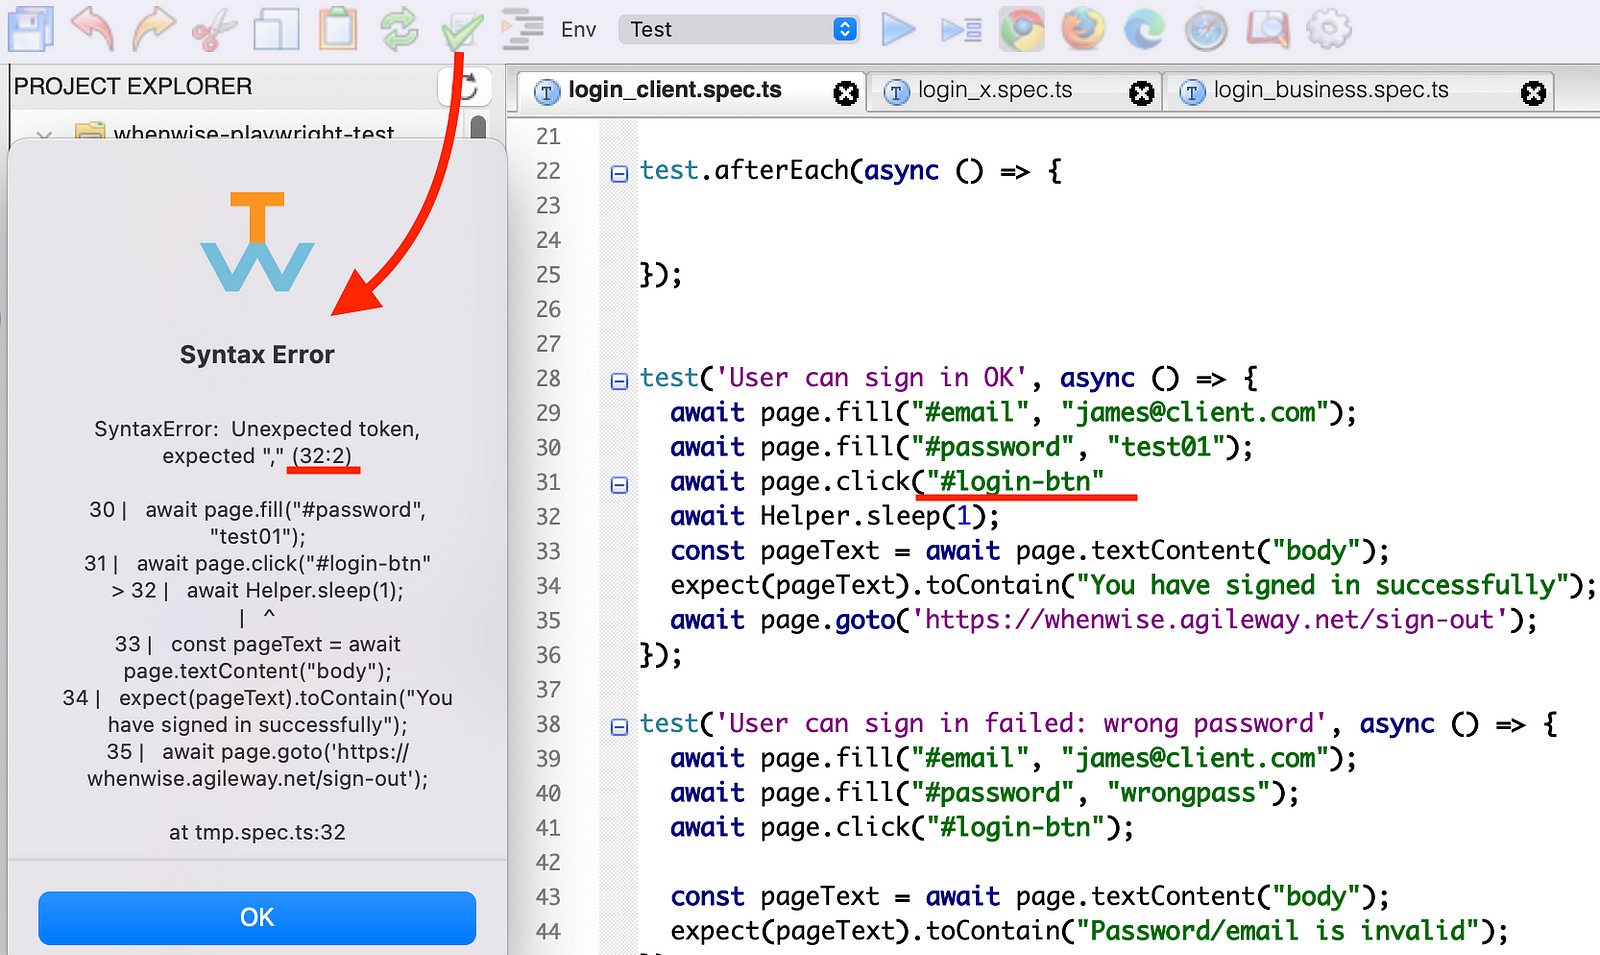
2. Syntax Validation
For beginners, it is easy to make typos in the test script (e.g. spelling mistake or missing parentheses). All program editors have syntax highlighting (colour coding to help find issues easily), and TestWise has a button on the top bar to check the syntax as well.
3. Snippet
It can take time to remember all the common Playwright functions/methods, especially while keeping the correct syntax. TestWise has a library of snippets, select the action you want from the list and it will insert the code block for you.
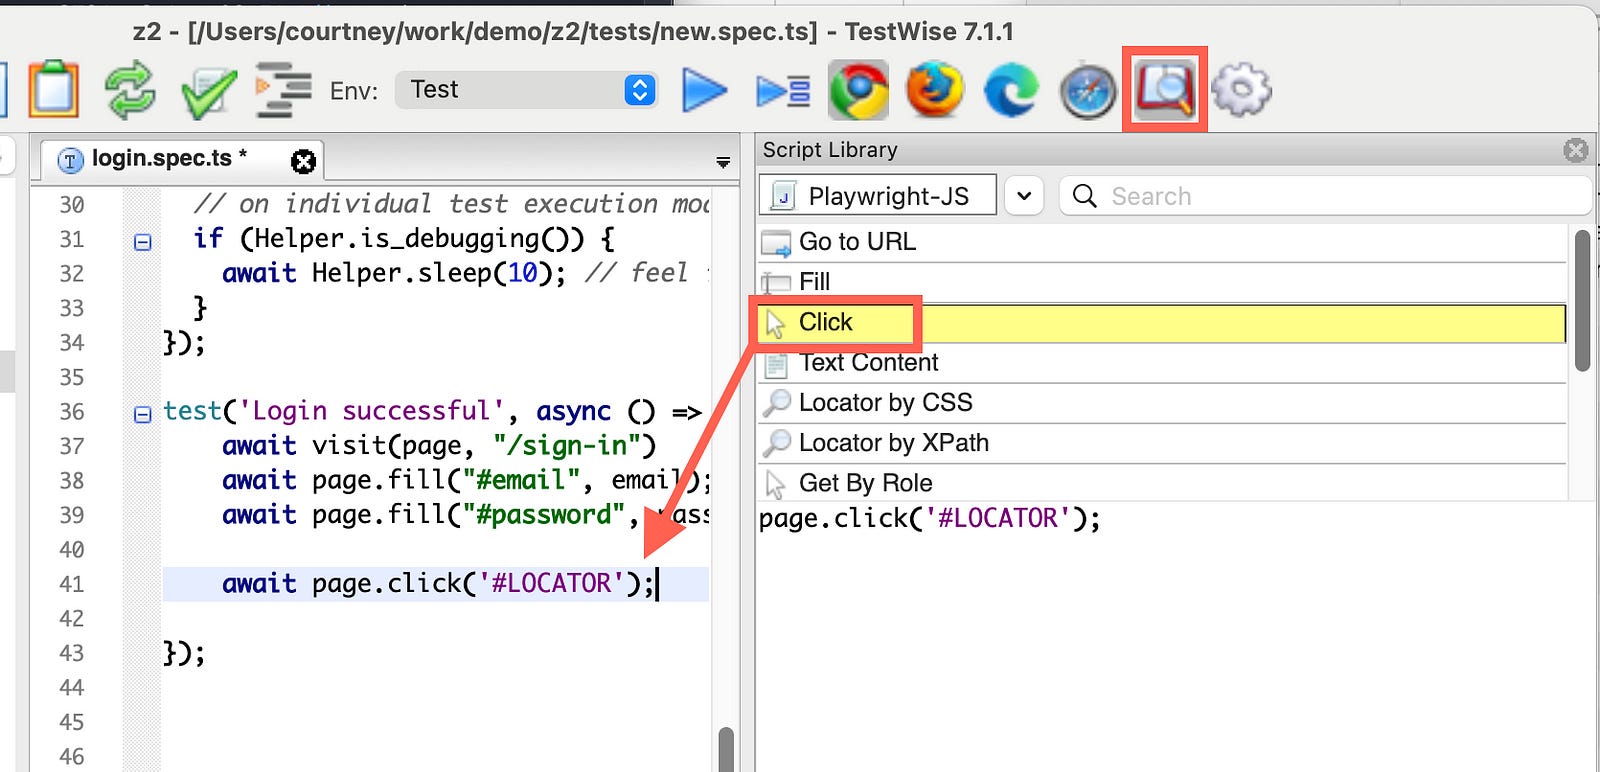
To view the snippets, open the snippet menu (book and magnifying glass icon on the menu bar), then double-click the snippet to insert it into the script.
Snippets are very handy, for frequently used commands, I prefer to use Auto Complete, though.
4. Auto Complete
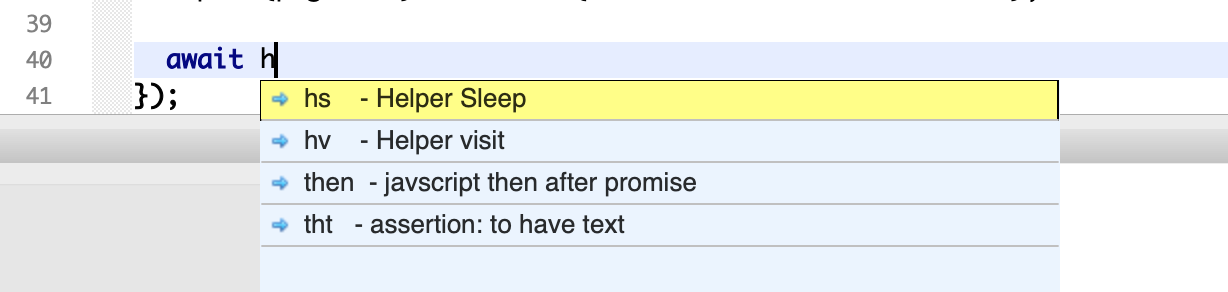
TestWise also has auto completion and shortcuts to help with common Playwright functions/methods as well.
You can type in a shortcut (for example, aw for await or hs for the sleep command), then press the Tab key to expand it to the full line for you.
The result after pressing “Tab”:

This is very handy and I use it a lot! To see the full list of auto complete options available, use “Command + J” on macOS (or “Control + J” on Windows).
5. Refactoring
Automated test scripts, like code (even more so), need to be refined to make them work efficiently, and more importantly, easier to maintain. Refactoring support in your Testing IDE will be very helpful.
TestWise supports refactoring in the IDE (see this article series for more details on what is available), similarly, VS Code also has some basic refactoring options available (though not as extensive as TestWise).
I will show you a refactoring example in Part 6.
Related reading: