Tutorial: Step by Step Implement Continuous Testing with Playwright: Part 4: Tool & Project Structure
An Introduction to Playwright’s Project Structure and the TestWise IDE


This article series targets absolute beginners who want to learn and use Playwright E2E (Web) Test Automation.
Part 1: Set up Playwright
Part 3: Run your first Playwright Test
Part 4: Tool & Project Structure
Part 5: Gain Productivity
Part 6: Design with Maintenance in mind (upcoming)
Part 7: More Tests * (upcoming)
Part 8: Set up Continuous Execution
Part 9: Run a small suite of Playwright tests in BuildWise, sequentially
Part 10: Parallel Playwright test execution in BuildWise
Part 11: FAQ
After Part 3, we have developed two proper Playwright user login test cases in one test script file: login.spec.ts.
So far, I haven’t mentioned any testing-specific tools. Most likely, you modified the example test script using Visual Studio Code or another programming editor.
In my book, “Web Test Automation in Action: Volume, Hands-On Exercises with Selenium WebDriver and Playwright”, I used Visual Studio Code to develop Playwright sample test scripts for the book.
Here, I will introduce TestWise, a testing IDE created by my father. Since it’s just a tool, the choice is entirely yours — as long as you remain productive in developing and debugging test scripts.
1. Use Test Project Skeleton Created by TestWise
Install and Launch TestWise (very easy and quick). Click “Create a New Project” link.

Fill the required project info, e.g. target folder (a new or empty folder), URL and framework options as shown. Click the “OK” button.

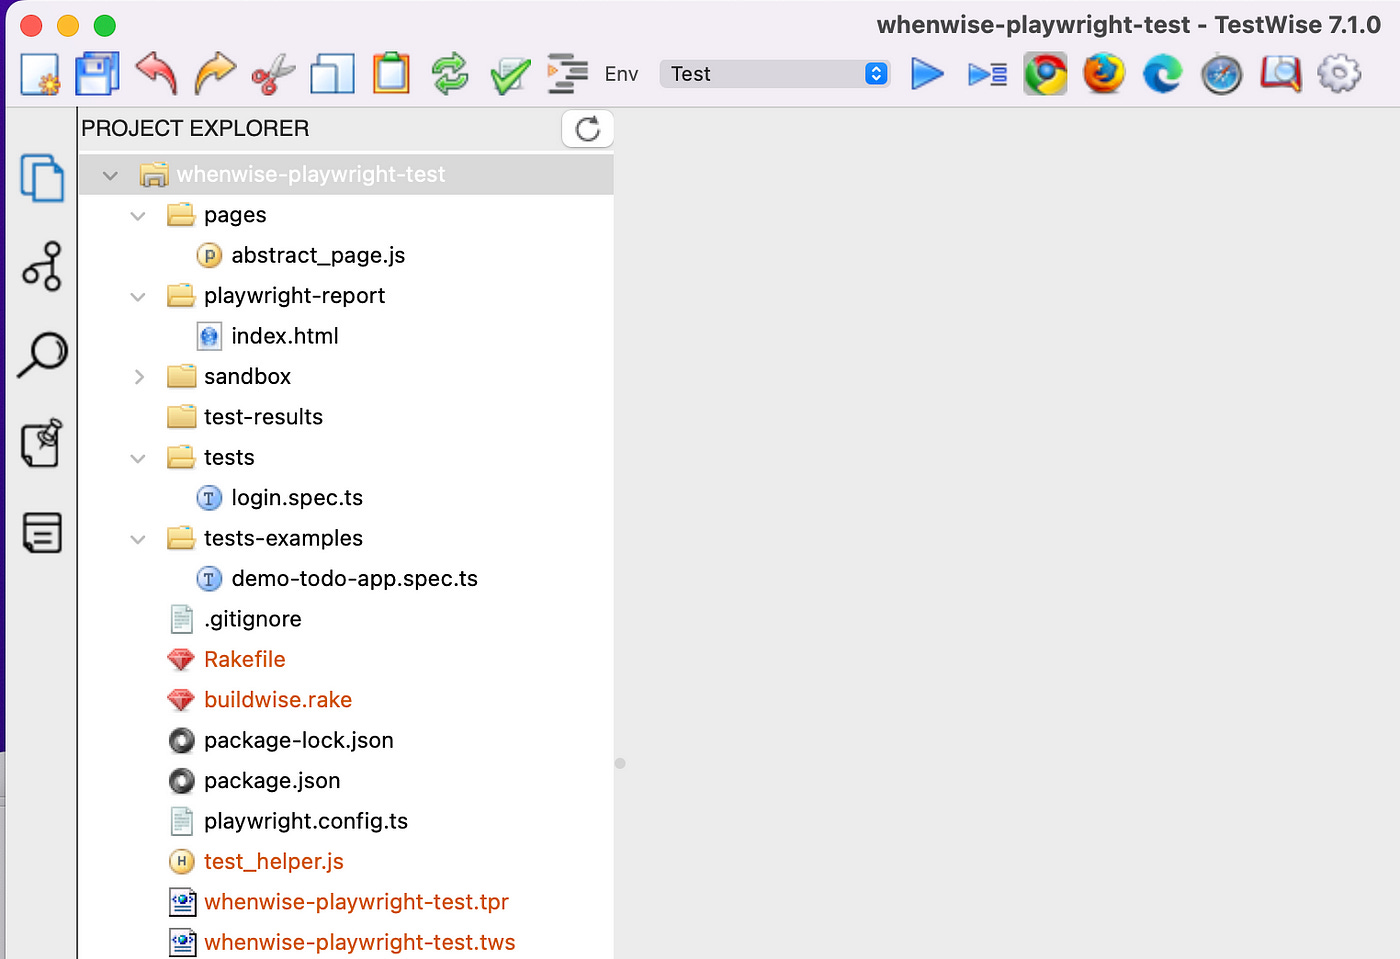
As you can see, some basic project files and folders are created. You may start developing there.
2. Make Your Existing Test Scripts Working in TestWise
Here, I want to demonstrate an important concept: test scripts are independent from tools. We make our existing test folder (created by Playwright) working in TestWise.
Copy the following to your existing test project folder.
pagesfoldersFiles:
Rakefile,buildwise.rake,test_helper.js, andxxx-.tpr
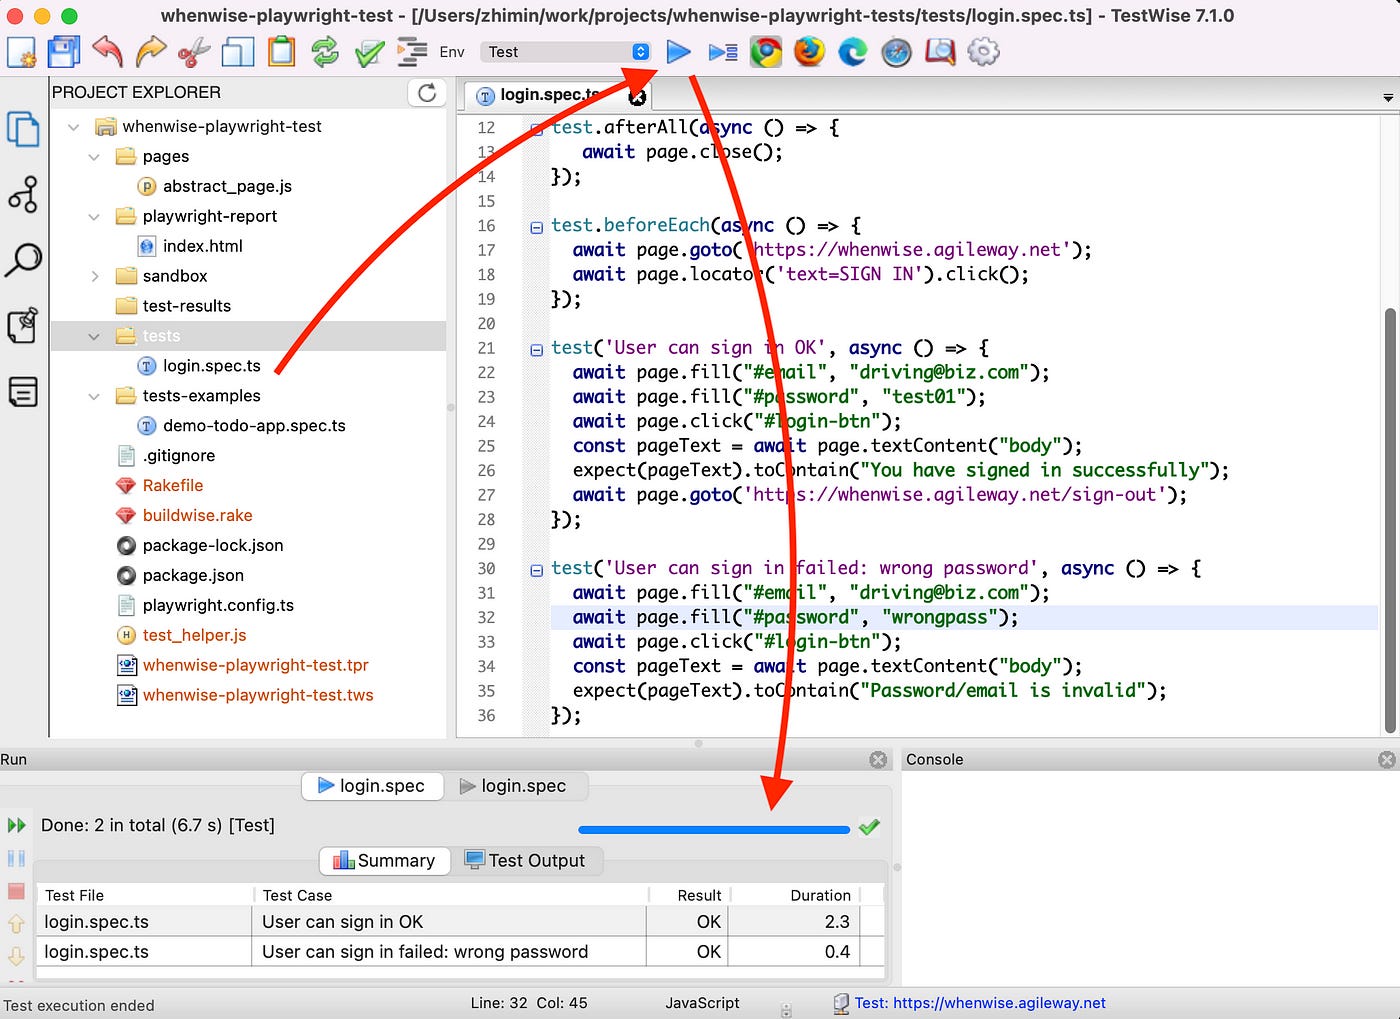
Then, relaunch TestWise. Click the menu ‘File’ -> ‘Open project’, and select the .tpr file in your work project folder.
Click login.spec.ts to open the test script, and click the blue arrow button on the toolbar to run the whole test script.
Troubleshooting
If you are unable to execute Playwright tests and you get this message:
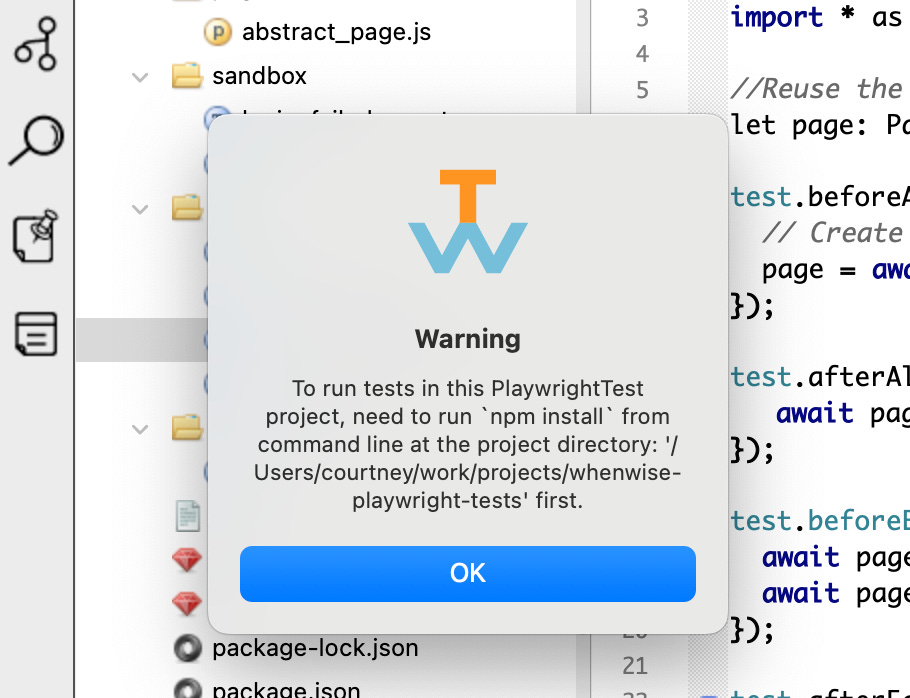
Follow the instructions, on the command line, go to that folder and run npm install, then npx playwright install. You should only have to do this once, just to get all the Playwright and Playwright dependencies (e.g. browsers) set up.
courtney@Courtneys-Mac-mini whenwise-playwright-tests % pwd
/Users/courtney/work/projects/whenwise-playwright-tests
courtney@Courtneys-Mac-mini whenwise-playwright-tests % npm install

added 6 packages, and audited 7 packages in 561ms

found 0 vulnerabilities
npm notice
npm notice New major version of npm available! 10.8.2 -> 11.3.0
npm notice Changelog: https://github.com/npm/cli/releases/tag/v11.3.0
npm notice To update run: npm install -g npm@11.3.0
npm notice
courtney@Courtneys-Mac-mini whenwise-playwright-tests % npx playwright install
You should be able to run the test now.
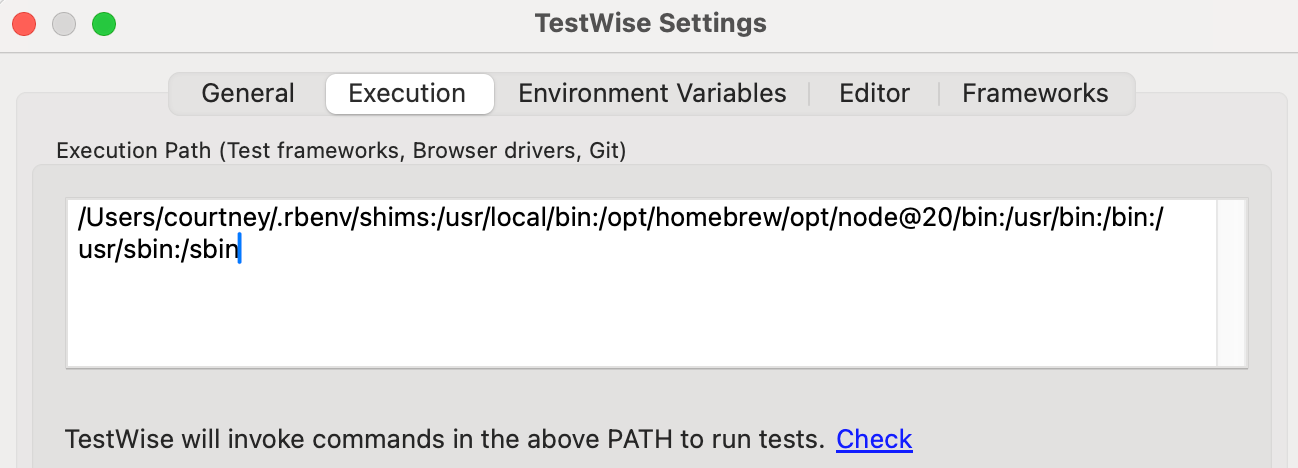
If you have already done this but are unable to execute Playwright test in TestWise, make sure you can execute the test from the terminal and then verify the execution path setting in TestWise.
3. The above Test Project Structure Setup is referred as “Test Framework”
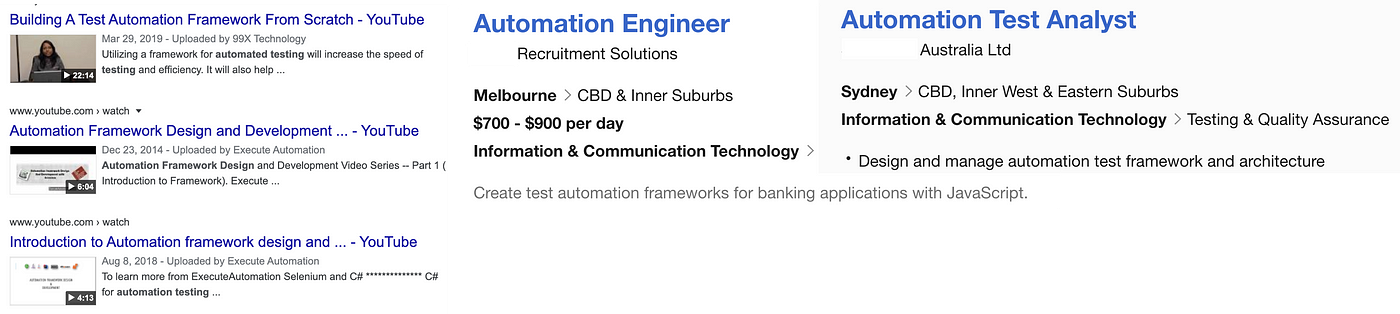
You might have seen “designing/creating a test automation framework” listed as a selection criterion in test automation job ads. In reality, this usually refers to setting up the structure of a test automation project — not building an entirely new framework like Selenium or Playwright from scratch. Think about it — someone with that level of skill surely won’t apply for a $700/day job!
A well-defined test automation project structure incorporates best practices such as using test helpers, implementing the Page Object Model, and even integrating Continuous Testing tools. I will cover those topics in later articles.
4. Create a new Test Script in TestWise
Right-click the “tests” folder, and select “New Test Script File”.

Type in the file name login_business.spec.ts. Please note, follow the standard naming convention (ending in .spec.t). Click the “OK” to create the file.
TestWise will create this test script file with the below default content.
import { test, Page, expect } from '@playwright/test';
var path = require("path");

test.describe.configure({ mode: 'serial' });

import * as Helper from '../test_helper.js'

//Reuse the page among the test cases in the test script file
let page: Page;

// BEGIN: import pages
// var FooPage = require('../pages/foo_page.js'))

// END: import pages

test.beforeAll(async ({ browser }) => {
  // Create page once.
  page = await browser.newPage();
});

test.afterAll(async () => {
  await page.close();
});

test.beforeEach(async () => {
  await page.goto(Helper.site_url());
});
test.afterEach(async () => {
  // on individual test execution mode, don't exit browser driver session immediately.
  if (Helper.is_debugging()) {
    await Helper.sleep(10); // feel free to change wait time here
  }
});

test('Test Case Name', async () => {
  //
  // await Helper.login(page, "agileway", "testwise")
  // await page.locator("text=Sign off").click();
  // const flashText = await page.textContent("#flash_notice")
  // console.log(flashText);
  // expect(flashText).toEqual('Signed in!');

});
There are some minor differences from the example test script that came with Plalywright, such as:
Loading a test helper.
import * as Helper from ‘../test_helper.js’A 10-second wait after test execution completes.
await Helper.sleep(10), this is to keep the browser open after executing an individual test case (not the whole test script).
5. Run Individual Test Case in TestWise
Most of time when we develop and debug test scripts, we run test cases individually.
To run specific test cases in TestWise, right-click any line within one test case, and select the first run option.
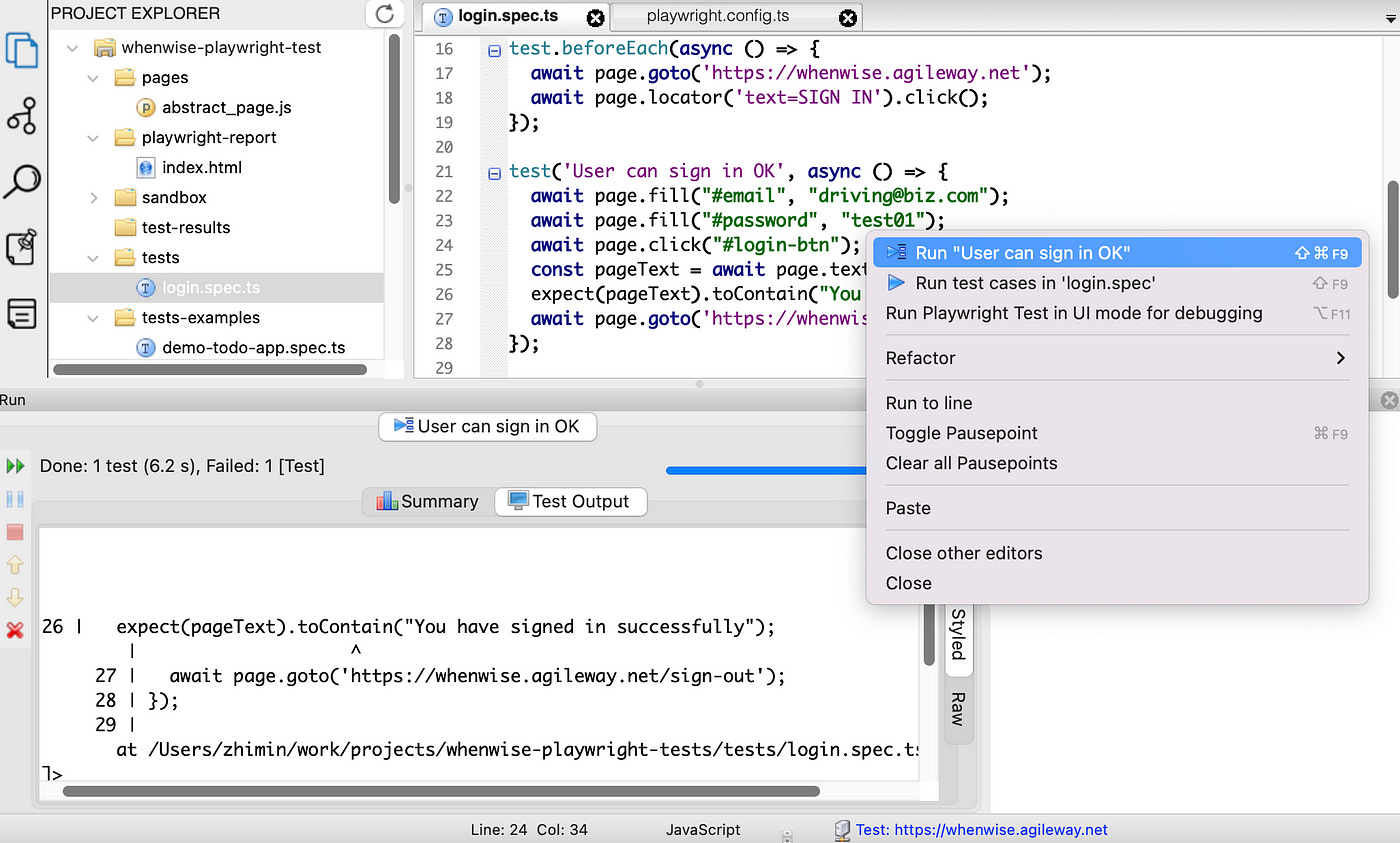
In the above execution, it failed. From the test output, it seems to be intermittent. The likely cause is the assertion check was too fast after clicking the ‘sign in’ button. (So, don’t blindly trust the Playwright’s auto-waiting).
One workaround is to add some fixed wait after clicking the ‘sign in’ button. You might remember that the line to do a sleep in JavaScript was:
await new Promise(resolve => setTimeout(resolve, 1 * 1000)); // 1 secTestWise skeleton actually provides a Helper (test_helper.js), which contains several handy functions, such sleep.
import * as Helper from '../test_helper.js'
//...

test('User can sign in OK', async () => {
  //...
  await page.click("#login-btn");
  await Helper.sleep(1);
  const pageText = await page.textContent("body");
  expect(pageText).toContain("You have signed in successfully");
  //...
});
This seems to have stabilised the test execution. It is good for a beginner, we will cover more test stablization in the future.
6. Benefits of using a Testing IDE
As you might have figured out already, within a Testing IDE such as TestWise, it is convenient to set up projects, edit the test script and run them, all in one tool.