Writing Your First Complete Appium Test
How to set up and run a complete Appium test on your own iOS app.
In previous articles, we focus on setting up Appium and executing XCUITest scripts in the iOS Simulator as a proof of concept. These scripts just execute actions, they have no QA value.
In this article, I will do a simple yet complete Appium test case. A complete test means:
Prepare your app for testing
Inspect and Locate Controls
Drive controls in the app
Perform an assertion (a.k.a checkpoint)
This article will roughly cover how to set up Appium tests for your app (rather than a sample app).
Export the iOS app file
Firstly, export your iOS app file. For simulators, you will need it in an .app.zip format. If you are running this on a physical device, export it as an .ipa file instead.
Follow the below article to export your app for the iOS simulator: How to transfer your App from one Xcode Simulator to another
Start a session in Appium Inspector
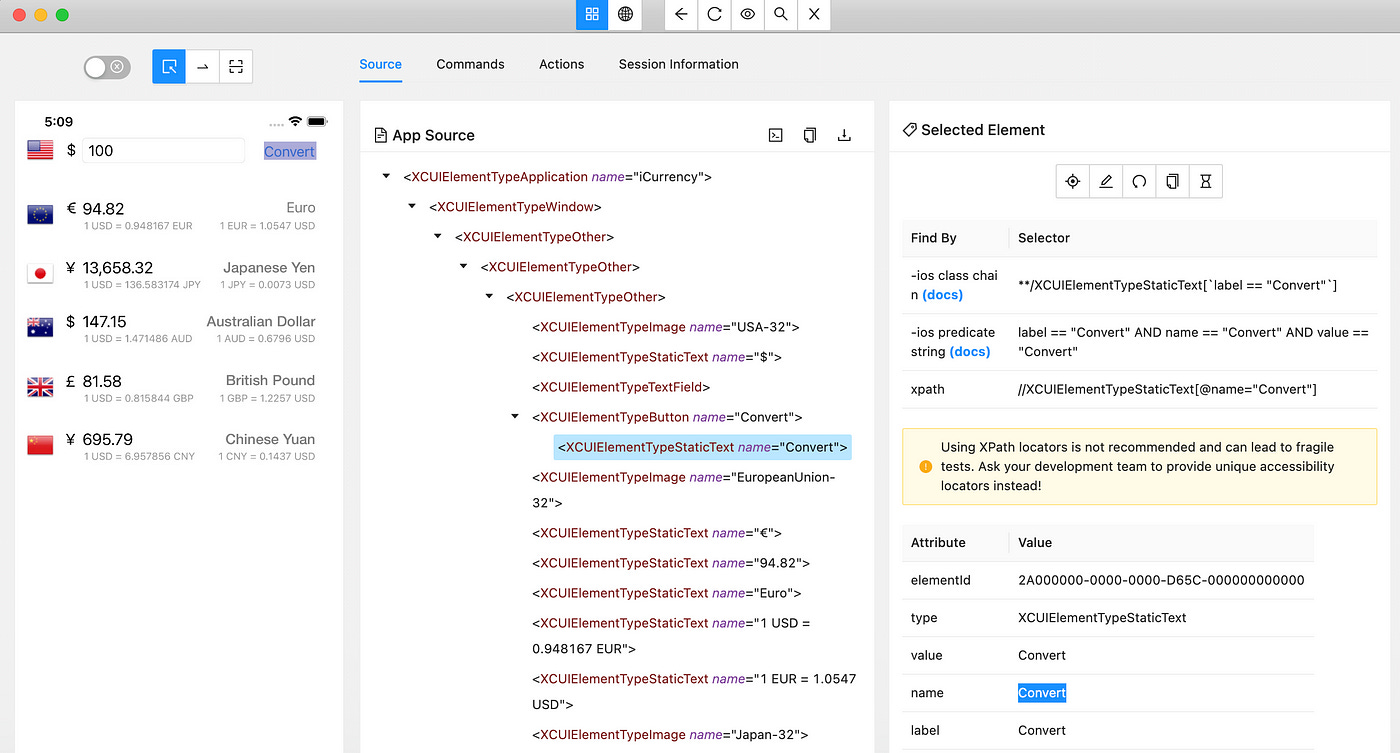
Once your app is exported, you can test your set up and start inspecting elements via Appium Inspector. Appium Inspector is a new utility for inspecting controls in mobile apps.
Please note the prefix: appium:, otherwise it won’t work.
Appium Inspector is quite intuitive once you understand session creation and app navigation. See these articles for a brief introduction on how to use Appium Inspector if you are new to Appium Inspector: Session Creation, Inspecting Elements and App Navigation.
Writing your test
There are three basic parts to your Appium automation test:
Appium capabilities — these will enable Appium to open your app to start the test
Actions — the commands to be executed (i.e. interacting with elements)
Assertions — the key part of testing; verify your app’s content matches what you expect.
Appium Capabilities
These should be an almost exact copy-paste from your Appium Inspector session creation capabilities. Here is an example for my own app (named iCurrency) compared with the Appium Inspector capabilities written in Ruby.
   the_opts = {
      caps: {
        platformName: 'ios',
        automationName: 'xcuitest',
        platformVersion: '16.2',  # change to match your Xcode
        deviceName: 'iPhone 14',  # change here if necessary
        app: "/Users/courtney/sample-apps/iCurrency.app.zip" # ipa file
      },
        appium_lib: {
          server_url: "http://127.0.0.1:4723",
          wait: 0.1,
        },
    }
Alongside the app capabilities, keen readers might also see that I specified the Appium server URL (server_url: “http://127.0.0.1:4723" ) and how long to wait for a connection before timing out (0.1 seconds). The server URL is required for v2 and your test may not run without it. I don’t believe wait is necessary, but it is good practice to include.
I recommend defining your Appium options in the before(:all) hook of your test script. e.g.:
  before(:all) do
    opts = {
      caps: {
        automationName: 'xcuitest',
        platformName: 'ios',
        platformVersion: '16.2',
        deviceName: 'iPhone 14',
        app: "/Users/courtney/sample-apps/iCurrency.app.zip"
      },
      appium_lib: {
        server_url: "http://127.0.0.1:4723",
        wait: 0.1
      },
    }
    @driver = Appium::Driver.new(opts).start_driver
  end
Actions
This is where your test shines!
Use the locators from the Appium Inspector and execute your commands. Don’t forget to include assertions.
A super simple test I’ll use as an example is just to check the app name.
  it "Get App Name" do
    application_element = @driver.find_element :class_name, 'XCUIElementTypeApplication'
    application_name = application_element.attribute :name
    expect(application_name).to eq("iCurrency")
  end
Executing your Tests
Once your test is complete, run it from the command line or your favourite IDE (mine: TestWise).
Since I have used RSpec in my test, install the RSpec gem:
% gem install rspecThen run the test on the command line:
% rspec icurrency_app_spec.rbThe output will look like below:


